Indeed, the finest laser printer would then probably experience a jammed paper. Someone’s day does not have to be destroyed whilst also unblocking a printer. Presumably, it has managed to clear tens of millions of paper bangers in my life, even before I decided to sit down to give it a little more consideration. I thought I had to share some assumptions I have made throughout my career in this desperate hope that they would stimulate others to encounter their difficulties to optimism or maybe even offer a few other recommendations for something like the professionals.
How to Stop the Paper From Jamming
Assume Regarding Your Paper
When it comes to a paper jam, using the right printing paper can help reduce the likelihood that it will occur. As the saying goes, prevention is better than cure. It’s important to note that older paper is likely to have absorbed moisture, so store your paper in a cool, dry place to prevent it from becoming damp. Printers dislike moisture. Be sure to use the proper paper thickness for your printer as well. Most printer paper has clear labels, but if it’s too thin or thick, you’ll experience paper jams.
Your Printer is Where?
It could appear peculiar that one of the simplest ways to clear a paper jam in a printer has to do with where the printer is placed, but a printer struggles to function properly if it is stacked on top of books or documents and isn’t level. Paper jams are more likely to happen if your printer is positioned incorrectly because many of the mechanisms depend on the printer being flat and level. You’re less likely to run into problems if you give it a good workspace. Additionally, make sure the in-tray is always in the proper position with paper in it and is never too full or too empty.
Maintaining Your Printer
A printer with built-up residue on printer nozzles or cartridges from dust particles is another typical reason for a paper jam. By following the directions on your printer, you can clean the printer heads. To get rid of the dust particles that might cause the paper to jam, you can also purchase some electronics dusting spray and, after unplugging the device, spray inside and around the printer regularly. Since microfiber absorbent cloths are less likely to leave residue behind, we advise using them in your printer. Learn more in our article, “5 Simple Steps to Cleaning Your Laser Printer.”
Lifting the flaps will allow you access to the printer rollers as well. You can clean the rollers with specialized wipes that won’t leave a residue, and you should do so until no ink is left on the wipes.
How to unclog an inkjet printer from paper jams
If a paper jam was inevitable, try to unjam it by following these steps:
At the power outlet, turn off your printer, then unplug it from the wall.
The remaining paper in the paper tray should be removed.
To locate the paper jam, lift the flaps on the printer.
Always take out the paper from the back; never pull it out from the front as this could harm the mechanism.
If you are unable to reach the paper, look for some tweezers and use those to gently pry it out. Similarly, if paper these have ripped to shreds, use tweezers to remove every last scrap from the machine by rotating the rollers.
All printing orders will be canceled when you restart your machine. To make sure your printer is functioning properly once more, we advise printing a test page before going back to your original document. You might want to get in touch with a printer repair service if your printer keeps giving you problems.
Why Do Paper Jams Occur?
Paper jams can sometimes just happen. One doesn’t necessarily indicate that your machine is broken if you experience one. Jams can also be brought on by using paper that your printer isn’t designed to handle, having the wrong machine settings, or using damp or wrinkled paper. However, your printer might have a more serious issue if it frequently jams and you consistently find paper stuck in the same place.
The Experiment has been Carried Out by Our Team
No Paper and A Paper Jam:
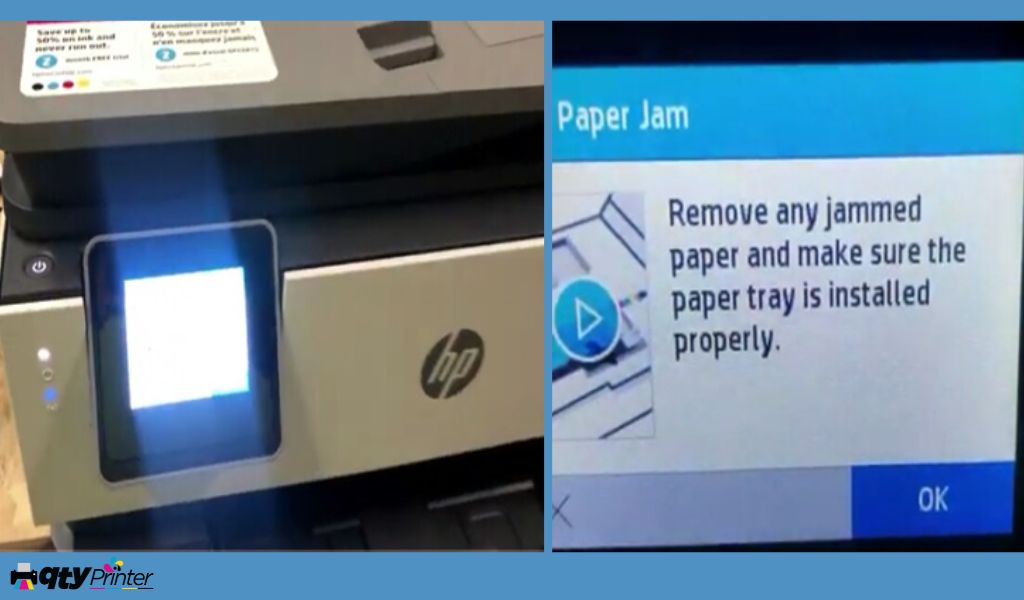
Why does the program assume that there is a paper jam if there isn’t one? “Start by removing every paper jam as well as focus on ensuring the paper tray is correctly installed,” gets to read the warning message. Whereupon, we demonstrated what to do to evaluate but instead quickly switch out using a faulty sensor gathering printer after recognizing and removing foreign material from the printers. That whenever a printer claims a paper jam even though no paper is in it, you would realize how to proceed.
Today, we are trying to answer the question–
Why does it say paper jam when there is no paper jam?
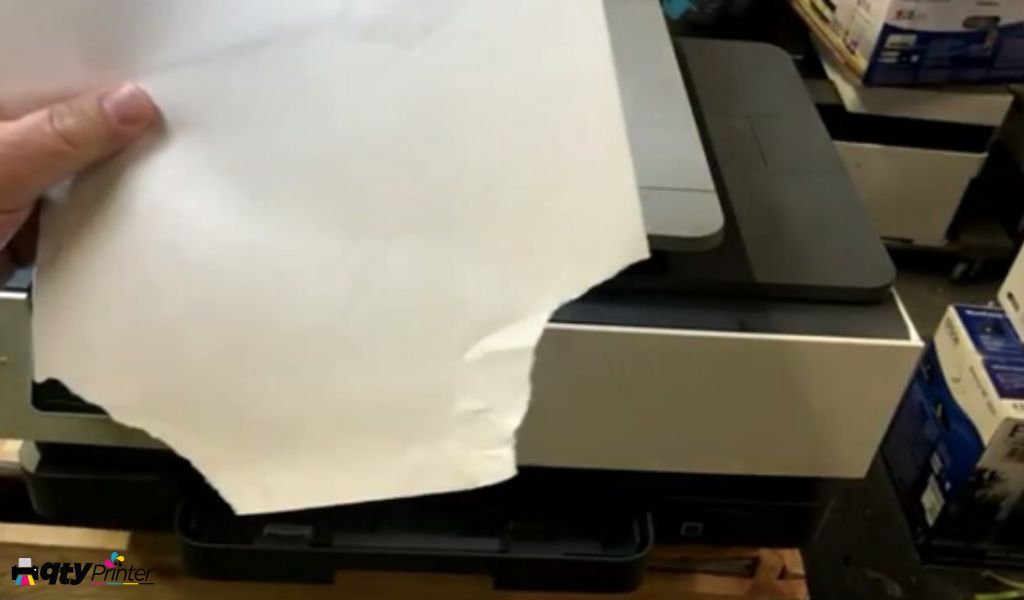
The first thing to do is make sure that there is no paper. When you fight with a paper jam, you might tear some part of the paper that may be still in there, or there is some debris.
Also, when you print the labels, it’s pretty common that a piece of the label just falls off, and it will stick inside of the printer, and you want to eliminate that possibility, too.
Shut the printer off, get a flashlight, and check everything inside. Remove the paper tray, then the turn printer upside down, and start checking underneath, too.
There are tons of tutorials, some of them made by HP, some made by other people to go through the process, Therefore, we are not going to cover it in detail here.
If these steps not working and you are desperate, you can try to hold the printer upside down and make sure your hand covered the scanner. Then you will see the piece of debris come out, and still just keep shaking it. If the printer is too heavy, you can use your legs. Our team is sure our printers will have a more elegant way of doing this.
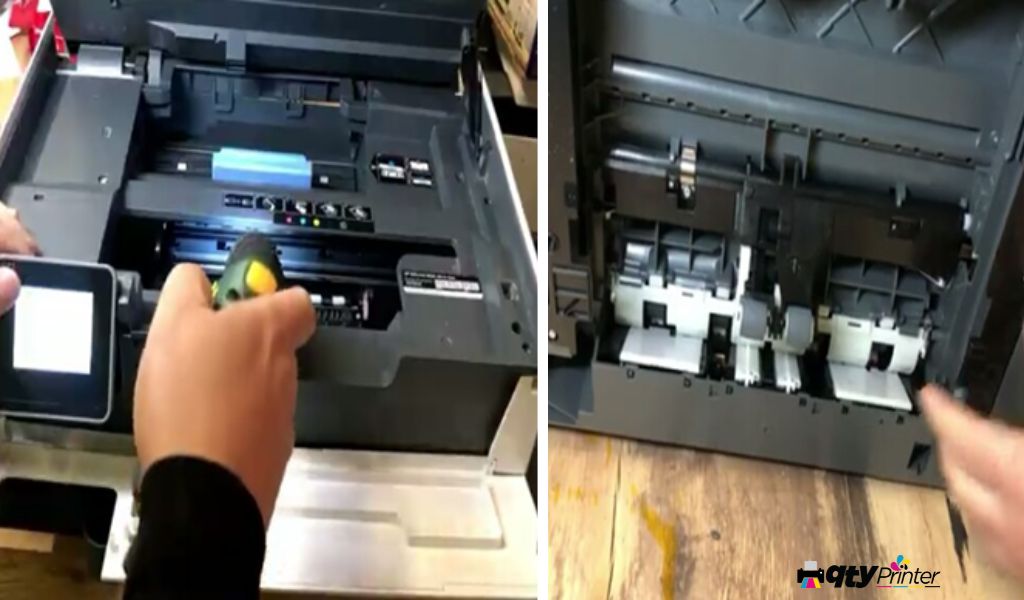
If you have already danced, it may not be the foreign object, it may be the sensors.
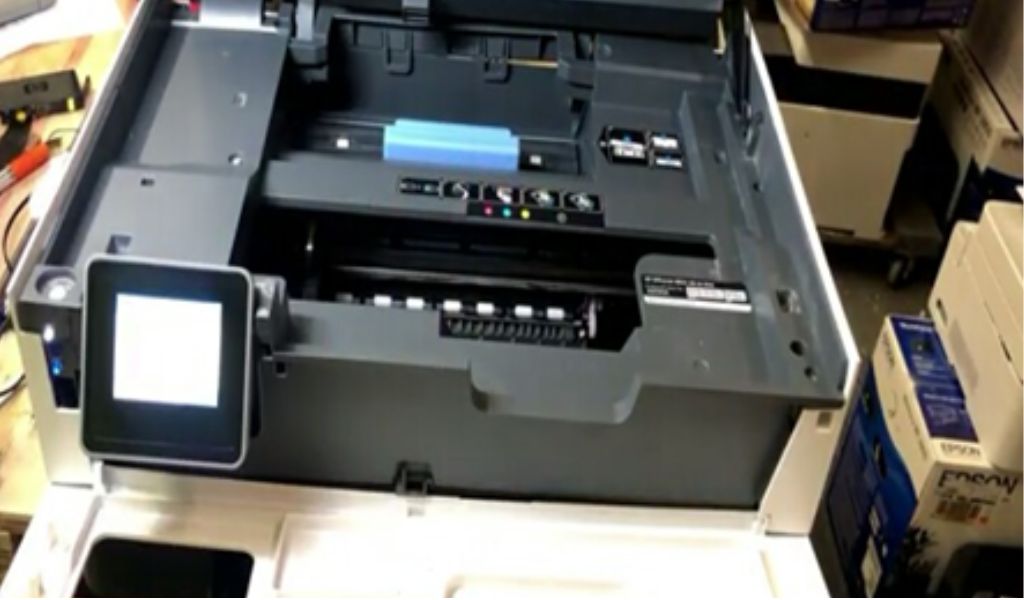
There are two in the back that sense the paper feeding.
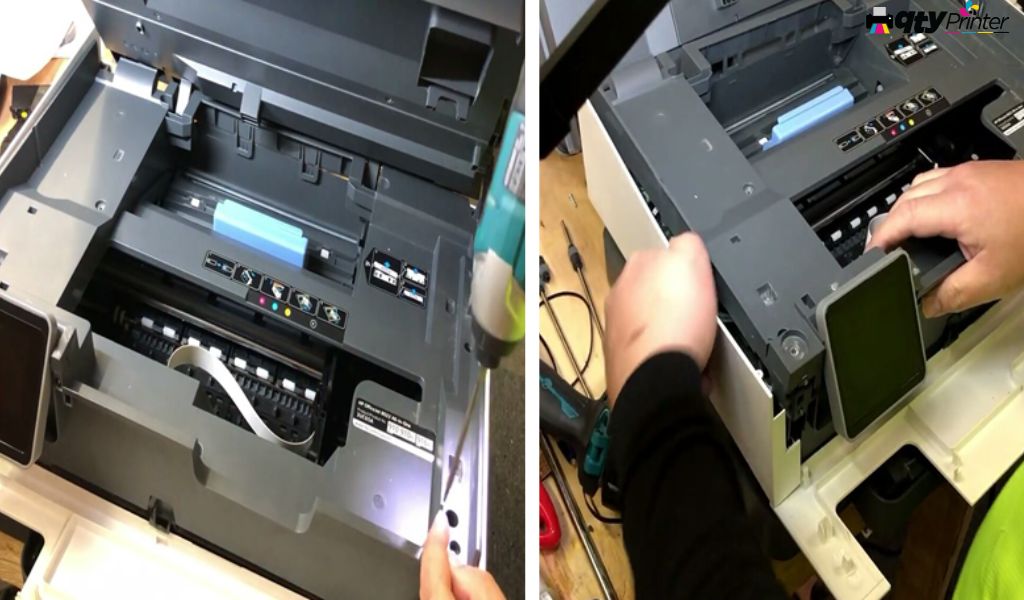
In the front, we have a door sensor, and we also have a sensor measuring the position of the printhead. Let’s say we have a piece of paper here and the printhead cannot move to the left, so that’s considered a paper jam.
The position of the printhead is measured by this piece of clear tape. There are little tiny marks on the tape, so the printhead can sense it and decide where the position is. If the tape is dirty and the printhead thinks it cannot move to the left, paper jam.
There’s no sensor between here and here. Your attention should be paid to removing and discovering foreign objects around this region. Then we are going to move on to the two sensors in the back.
The first sensor is a tray sensor. It’s very hard to find. It’s on the left. Just pull out and insert your paper tray.
Then pay attention, we are going to see it. The paper tray will push this lever inside, and then mechanically, they’ll force transfer to the left, and a small lever will go outside.
You are going to check if you will push the tray in that the lever goes forward. As you see, In, out, in, out. Looks good.
You may ask why we check the tray sensor, but if you read the error message clearly, it says, “Make sure the paper tray is installed properly.” I did see that this lever malfunction triggers the same error message. You thought it was a paper jam but it is about the tray.
This lever assembly is over-engineered.
You can see there are lots of moving pieces. If a little piece is out of position just a little bit, that lever will not go all the way forward. The lever is mounted on this piece of electronic board.
There are two slots. One slot is for the tray. Another slot is for the paper ejection that we are going to cover next. If the tray lever moves forward, it will move out of the slot so it will unblock the sensor. If it is not going forward completely 90 degrees, that will still be blocking the sensor. That is a wild error you might have.
You might have a malfunctioning board. If you check out everything physically is fine, it probably is the board.
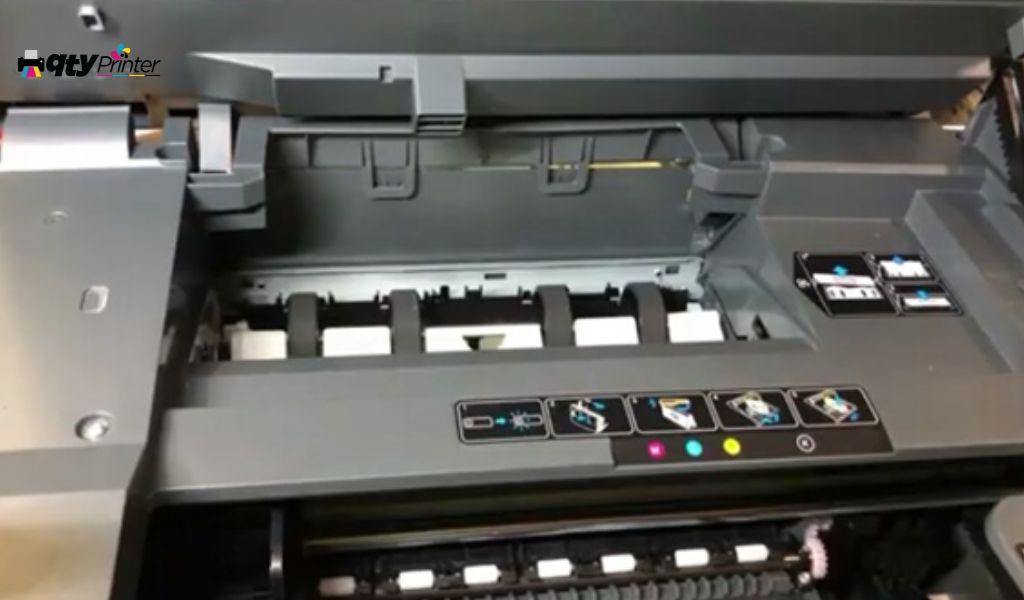
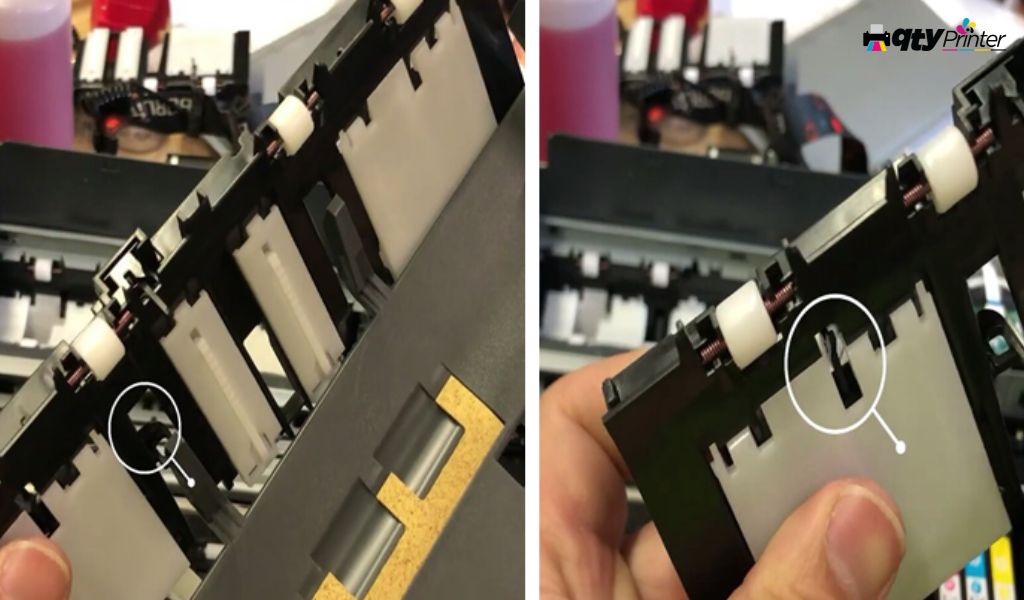
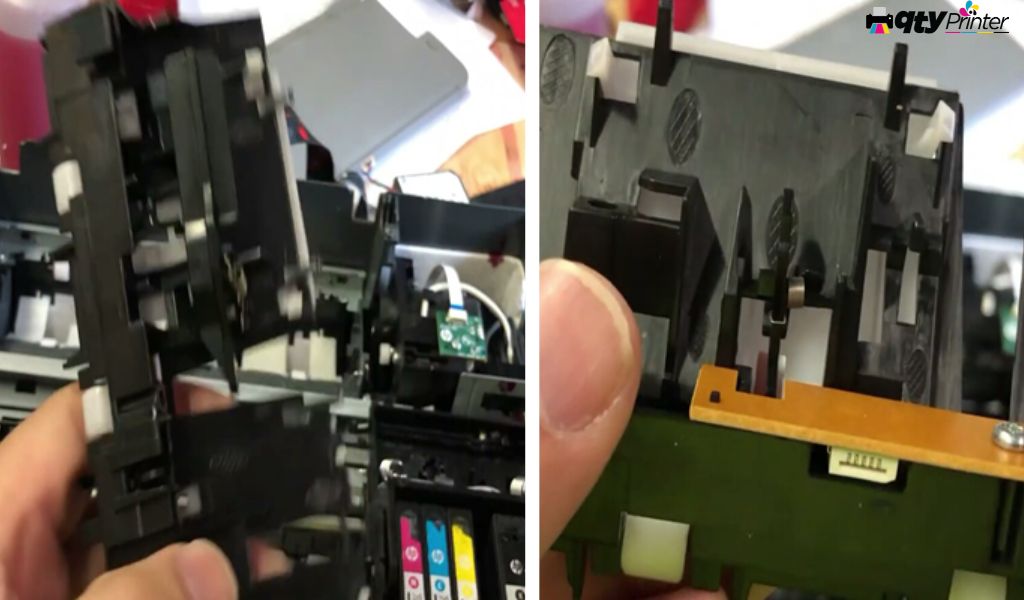
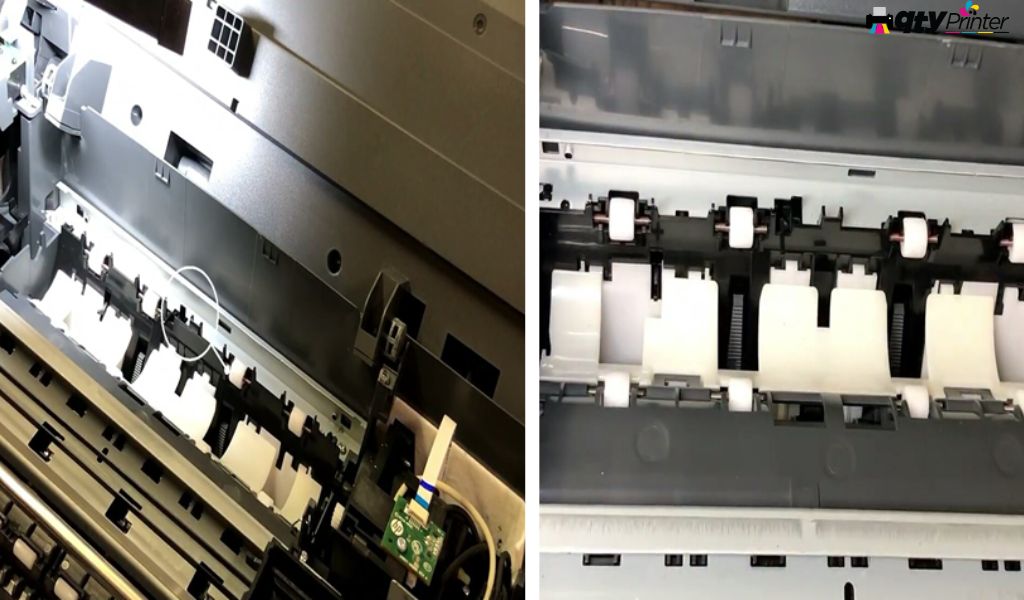
The second sensor is the paper ejection sensor that is controlled by this lever in the middle. You can see if there’s a piece of paper, the lever going to rise, but when the paper’s gone, it will snap right back.
Let’s check the printer that has the problem. That does include the position and the rise up, come down, rise. Here it does not come down sometimes. HP doesn’t like people to mess with their printers. If you want to keep this printer in the long run, then you need to invest in a pair of screwdriver bits. Go to your local hardware store and ask for a T10 and T6. Use your T10, and remove eight screws from the front. This scanner hinge, there’s no trick to it, and just a brute force, push it up front and they’ll snap off. Then you can remove four screws along the back border. Then you can loosen up the cover. Lift the left panel straight up, it will come off, and disconnect the big cable. Remember, the blue side up disconnects that little one, blue side front. Then step forward.
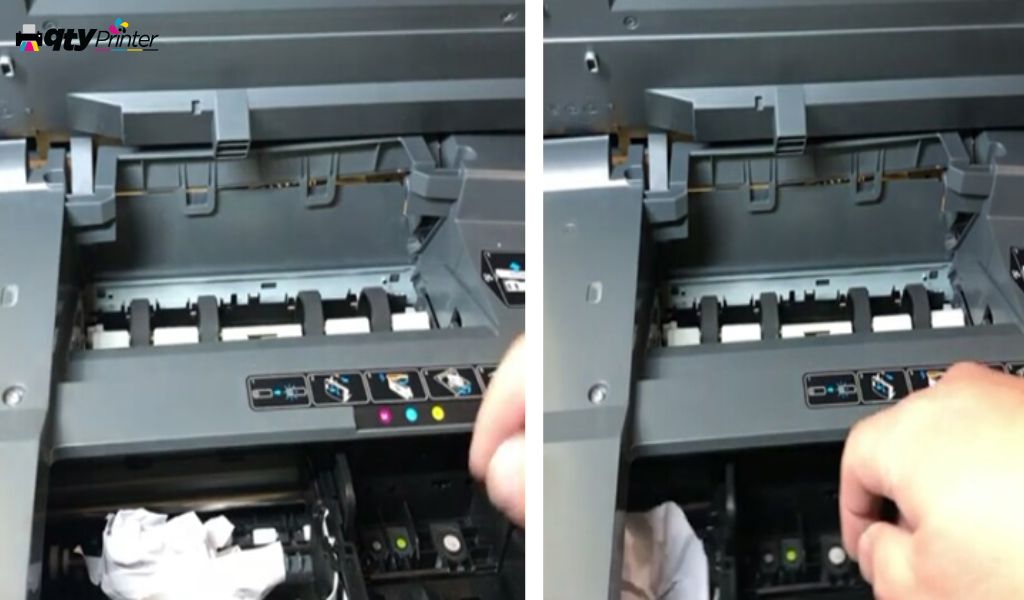
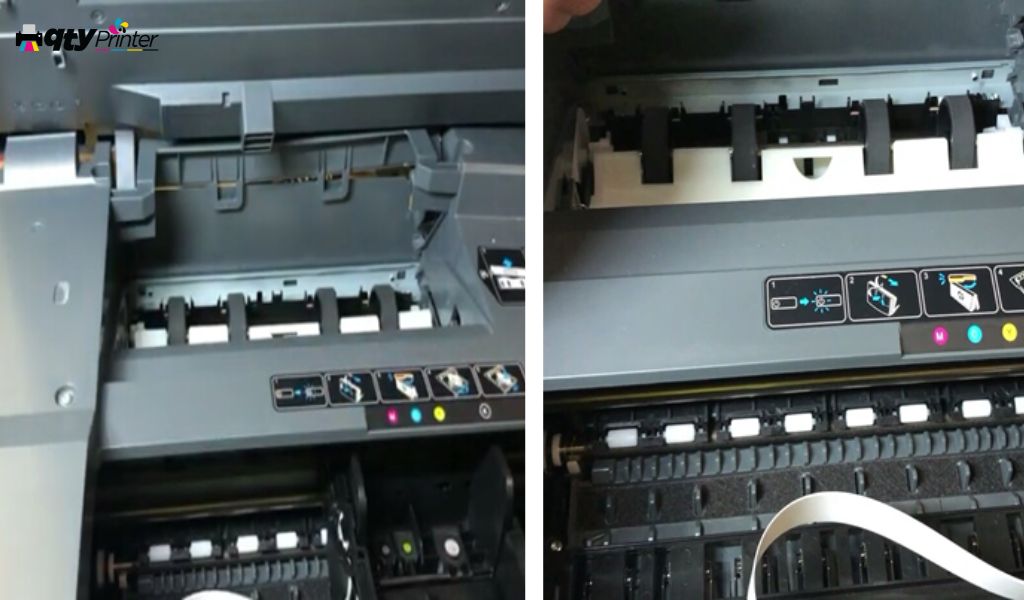
Then you can remove that whole front panel. Then we will remove the duplex cover. See that black lever? Then press that black lever to the left and then, remove the roller.
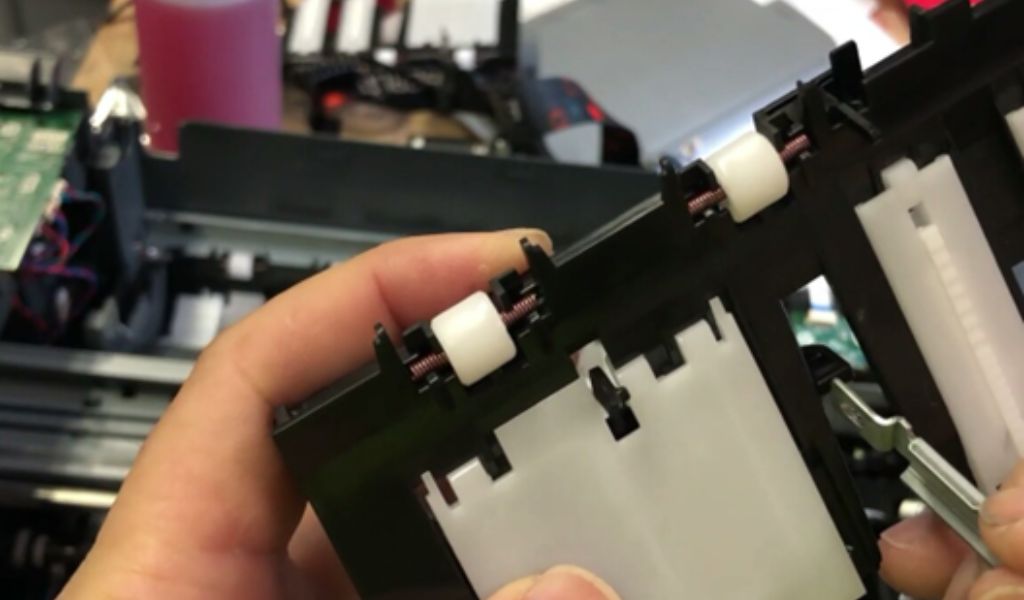
All you have done is try to gain access to the paper eject lever. Now, the only thing that stops you is this piece of metal on the top. Still using T10 to remove the four screws. Now, we would be ready. You can just hold to it and then pull it straight up, and the cover will be right off.
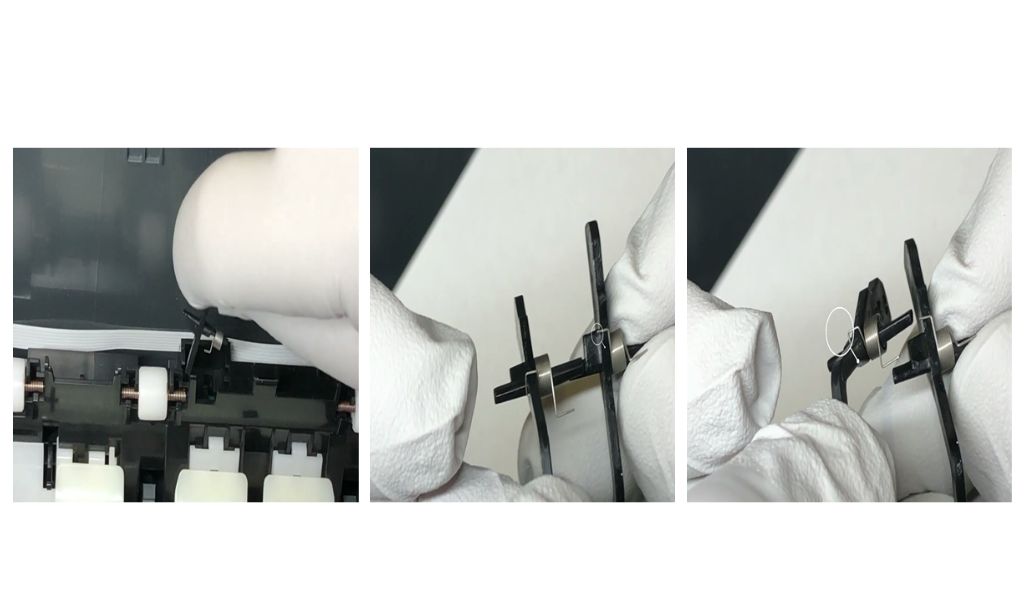
Go to printer parts, and paper handling. Here are the two little springs that we are going with the cover gone, and the lever can be pulled out. We’re going to show you a good one first, and then we’ll compare the bad one. The lever sits in the printer like this and goes up and down, and the tension is done by that little spring. The spring going to load, and unload for each page and it does a lot of times and may have metal fatigue. The good ones are on the left and the bad ones are on the right. You can see that on the right, it doesn’t have that little hook. That piece of hook broke off. That is why sometimes it can catch the lever and the lever can come down, but sometimes it can not. That is why sometimes you will get a paper jam, sometimes you do not have a paper jam. You may find something like glue, glue it or have a plier and rewire it.
Now, assume the problem is not the PE sensor and we do have to access the electronic board and/or the tray sensor. Disconnect the big and small cables of the scanner and lift the scanner straight up, and that scanner will come off.
Flip over the printer, and you’re going to see a tiny spring on each side.
In the above springs which I attached the pic of those two springs are holding this wider piece of plastic. With other springs, you can just snap the cover right off.
Now, you try to do these procedures for further details must watch this
Do not do anything without understanding the entire steps of jam paper and then Watch the whole video for how to disconnect this part.
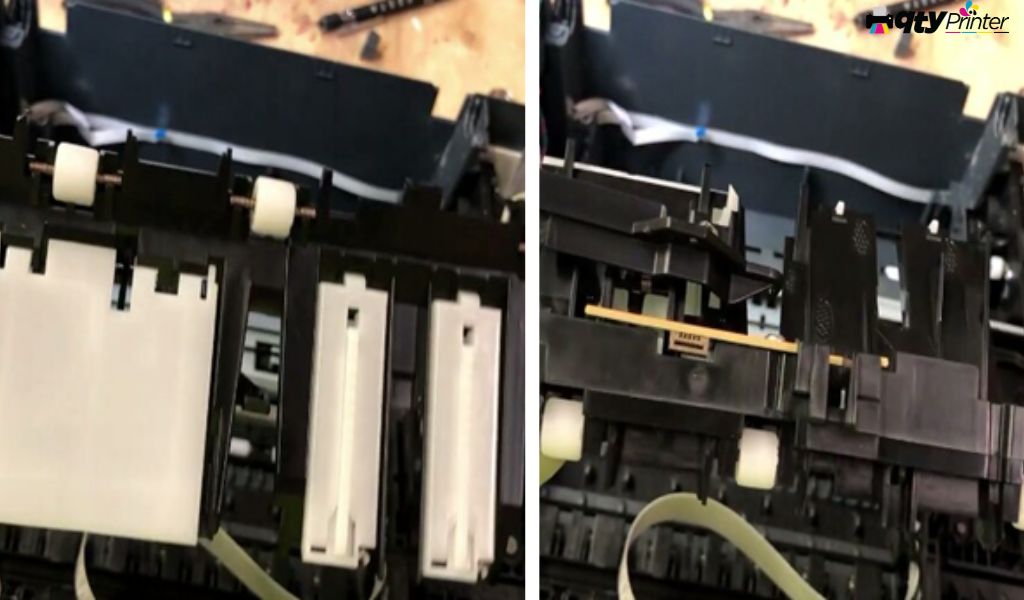
Note: Flip your printer upside down, and you will be going to see in the middle, that there will be a black part that sticks out. The grand plan is just to bend it and snap it off. Then your whole unit can be removed and put back, and then you will print happily ever after. However, if you don’t know how to snap it, you will be gonna break this. This thing stays here.
Let me remove the bottom of the printer and show you.
The axle that the thing is turning is
stabilized on the whole black plate. See?
Here. Then, here it comes with the little box it needs to grab. It’s grabbing with a hook in the back. Now, have an axle and now, I’m grabbing this little box. When we got it forward if we use an even force, this thing will not break and it’s easily grabbed and grabbed. The only time you can break it is if you apply uneven force because the whole blackboard is loose, so your axle may not be straight.
You might twist a little bit, then when you pull, it is twisted on the one side that got more force than the other one.-How about that? Snap it off like a boss.
You can do it all day long. To install it, just upside and the slider in the axle first, then bend it backward. Here, I removed the bottom, so there is nothing to stop the letterbox from moving back, but in reality, there is a bottom to stop the box from moving back so the box will slide in easily.
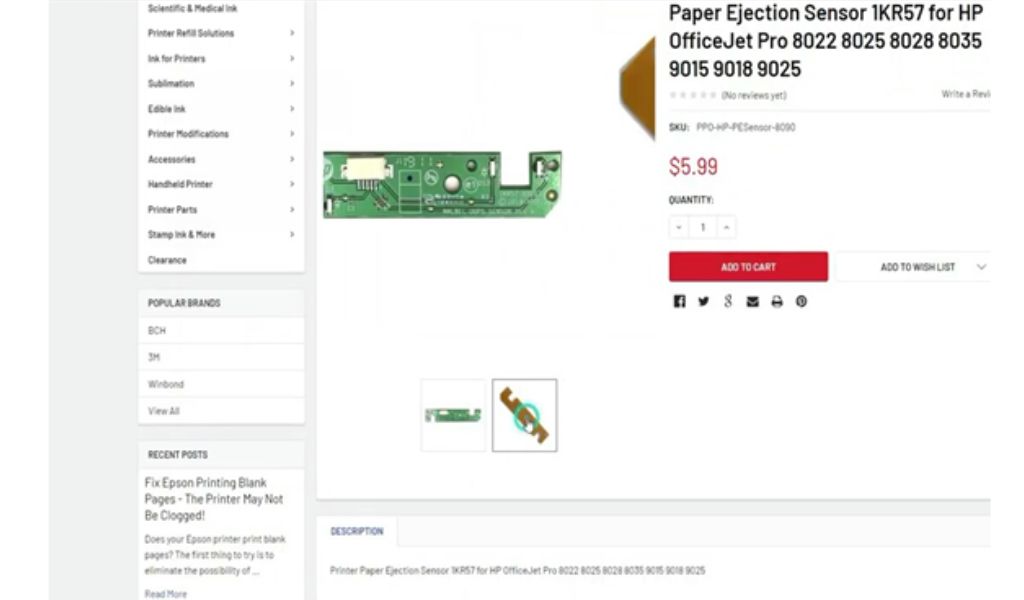
Now, you can take the whole board out by disconnecting the cable, and you’ll get access to the tray sensor, and you can take the electronic board if you need to replace it or just swap it for a new one.
The installation is just a reversal of what we told. We already covered a couple of things that we want to emphasize when doing the installation.
We hope now you understand it clearly and Epson, Canon, then HP, refill all your destiny. These refills are your destiny. We hope this fixed your problem.
The Removal of a Paper Jam in a Laser Printer
We advise that you proceed like that used to unclog an inkjet printer, but you must give your laser printer some time to cool down after turning it off and opening the flaps.
Before attempting to remove the lodged paper, give the rollers and fuser at least 30 minutes to cool down. To locate the stuck paper in a laser printer, you might also need to remove the toner cartridge. However, make sure to rest the cartridge on something you don’t mind marking, such as scrap paper, before doing so.
Use these suggestions the next time you have a paper jam to resume printing as soon as possible.
Frequently Asked Questions About How to Fix a Paper Jam in a Printer
Cause and Remedy
Depending on which is simpler, slowly remove the paper from the Paper Output Slot or the Rear Tray.
Remove the rear cover.
Draw out the paper gradually.
Rear Cover, close.
Press the RESUME/CANCEL button on the printer after reloading the paper.
A paper jam can completely stop your printing. A paper jam is frequently quickly fixed without causing any harm to your printer.
Step 1: Restart the printer after turning it off.
To turn the printer off, press the Power button. Remove the printer’s power cord from the back if it still won’t shut off. pause for 60 seconds. Reattach the printer’s power cord to the back.
The paper feed rollers may become clogged with dust, paper fiber, and other debris, which can result in paper jams and other paper feed problems. Try printing again after cleaning the rollers in the printer. Disconnect the printer’s power supply after turning it off.
The Verdict
Every verification scanner does have rollers located at the commencement of something like the paper route within which 90% upwards of the dirt and rub-off accumulates, making that area among the most susceptible to improper maintenance. The before and after images of this scanner, which was brought in for repairs, show how much of a difference this can make. The best thing you can do to keep your scanner in good working order if you don’t do anything else is to make sure the front feed rollers are cleaned. This will help you avoid misfeeds and other problems that could cause the scanner to stop working. The first thing you should check is whether your scanner has been cleaned recently or if it seems to jam or start and stop frequently.